

How To Create Rain Effect In Photoshop
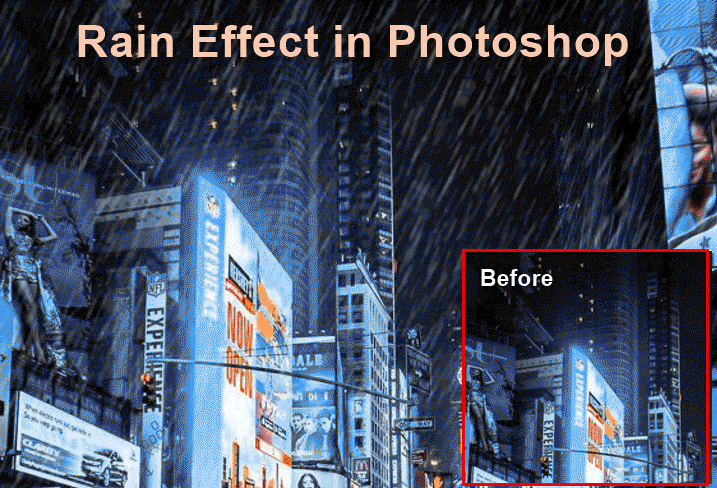
What is Rain Effect in Photoshop?
Photoshop can be used for creating stunning visual effects and transform the image according to the creator's concept, and numerous 2D and 3D artists and video editors in gaming studios use Photoshop to enhance the visual quality, you can create an effect such as rain with ease using Photoshop, but for that, the user must get familiarized with the various concepts and steps involved in the process and learn to create other effects such as snow, smoke, destruction, color contractions and adjustments.
How to Create Rain Effect in Photoshop?
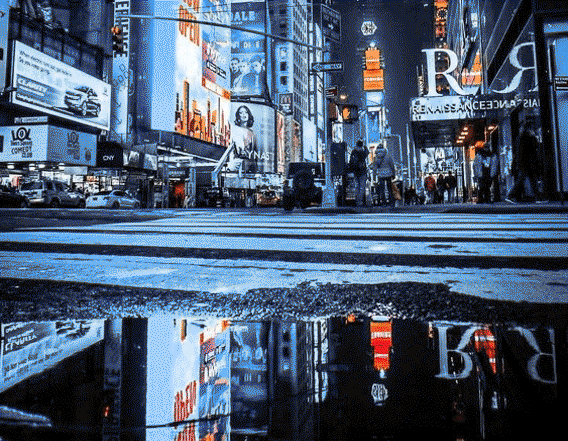
To create a rain effect on an image, the selection of the image also plays importance to have the effect applied and look natural. So select an image suitable for the effect. So we are going to apply an effect to the below image.
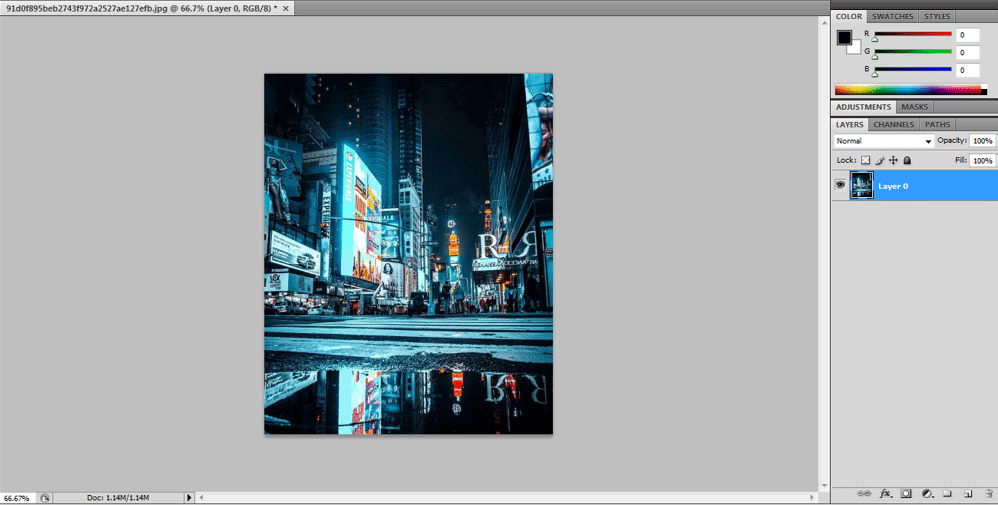
Step #1: Add a New Layer
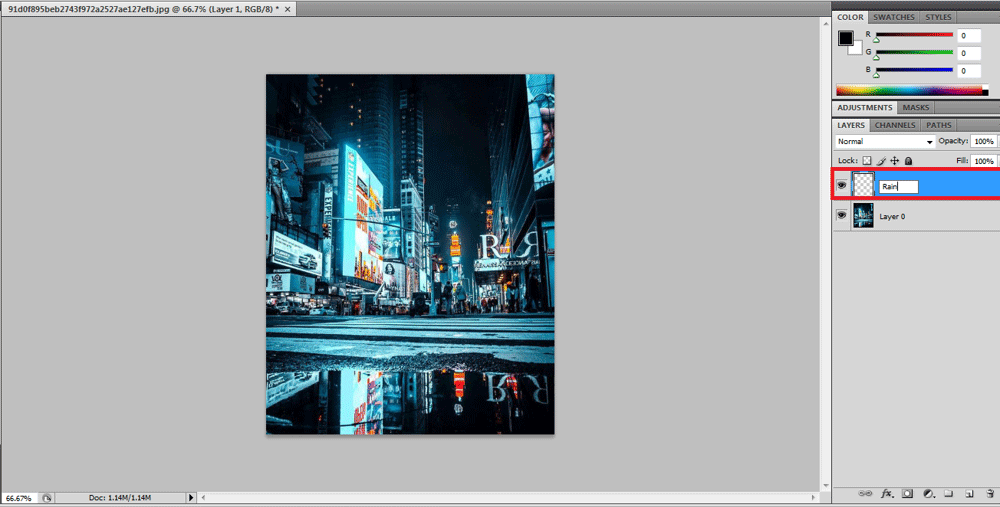
Open Photoshop and load the image and add a new layer by the options present on the right bottom corner or use short cut Ctrl + Shift and N together to load the new layer on the Layers pane and rename the new layer by double-clicking on its name as Rain to apply all the effects on it.
Click on ok or enter once the renaming is completed.
Step #2: Fill the new layer with Black
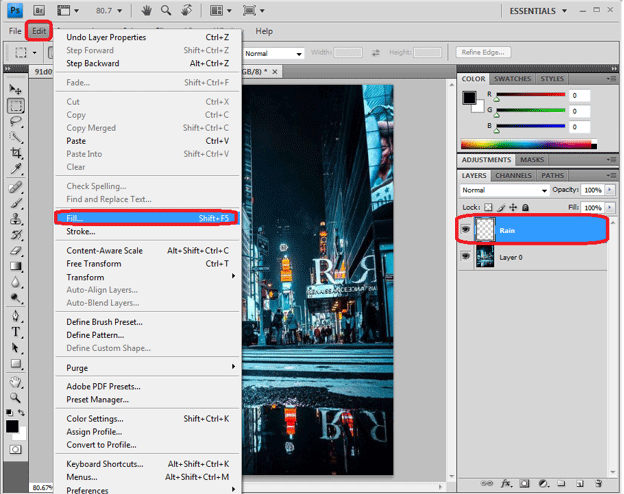
Now we are going to apply all our attribution to the new layers so that our original remains safe. Now we have to fill the layer with black color. Go up to Edit and select the fill option; a new dialog box opens with fill property details to select.
Edit -> Fill
Short cut: Shift+ F5
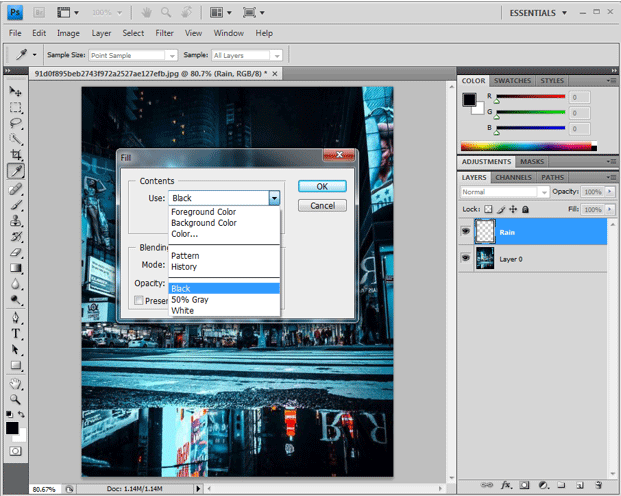
We have used the drop-down from the fill dialogue box to select multiple options and select Black from the drop-down window. By maintaining the Opacity 100% and Mode as Multiple as default.
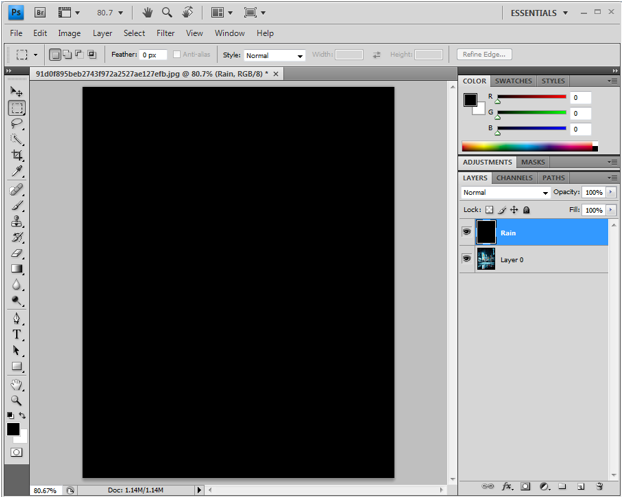
After doing this, we can see the complete layer is filled with black color as below image.
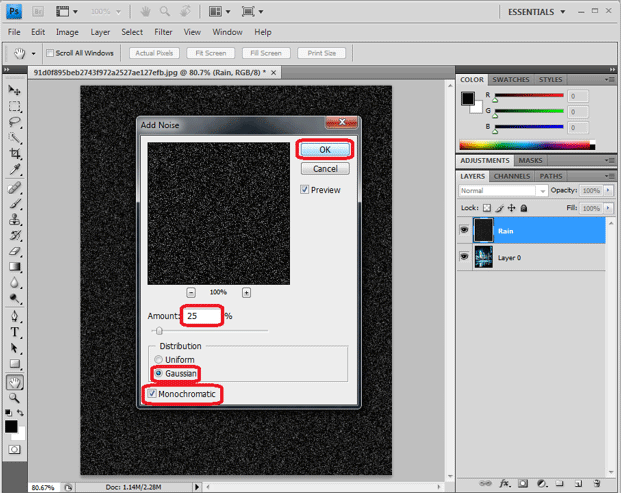
Step #3: Apply Noise Filter
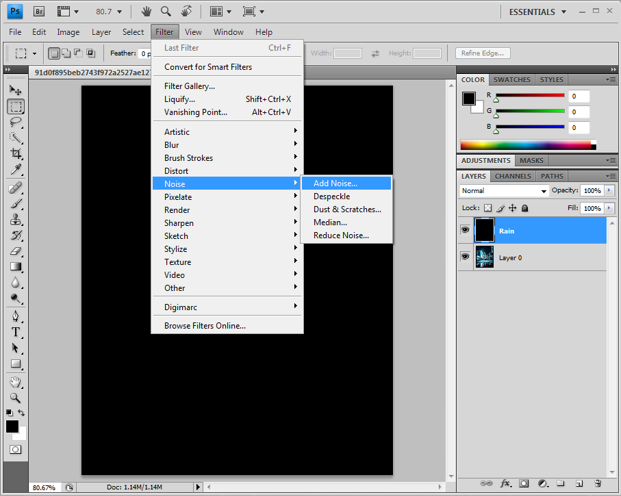
To create a rain effect, we use the Add noise option in Photoshop to get white drops to look on the image as raindrops. To do this, we need to click on Filter from the menu bar and place the mouse arrow on noise; by doing this, the Noise sub-option will be opened select Add Noise to the layer.
Filter ->Noise -> Add Noise
By adding noise, a noise dialoged box opens where we have to change a few properties like the Amount of Percentage must be 25%, Distribution Mode to Gaussian, and Monochromatic Enabled.
Amount 25%, Distribution – Gaussian and Monochromatic Enabled.
By doing this, the layer will be filled with dots to continue with the next process.
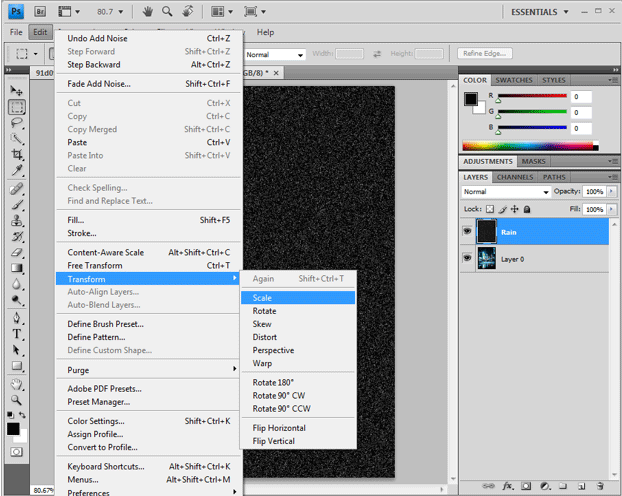
Step #4: Scale and Link Layer Width and Height.
Next, Go to Edit, click on transform and select scale. We can see the few options appearing below the menu bar.
Edit ->Transform -> Scale.
In the options bar, click the link ( – ), which is between Width and Height values. And based on the size of the image, the rain layer weighs dots that can be scaled by changing the values in Width and Height. The frequently used Height and weight values are 400/400 200/200 etc. as required. For this image, we are going to get the height and width as 400 each.
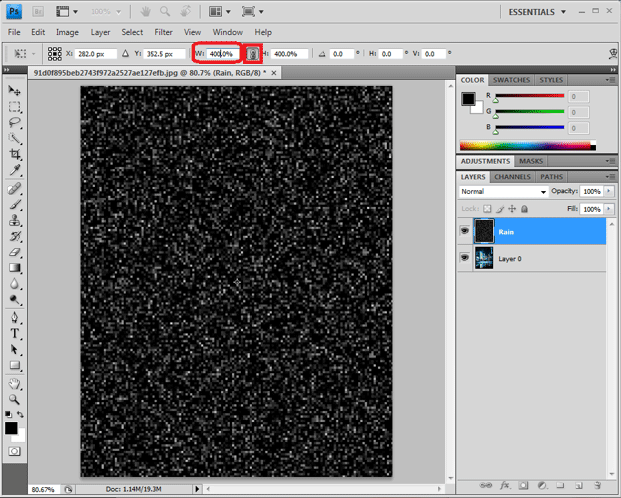
Click on the tick mark, which is present at the right corner, to apply the changes.

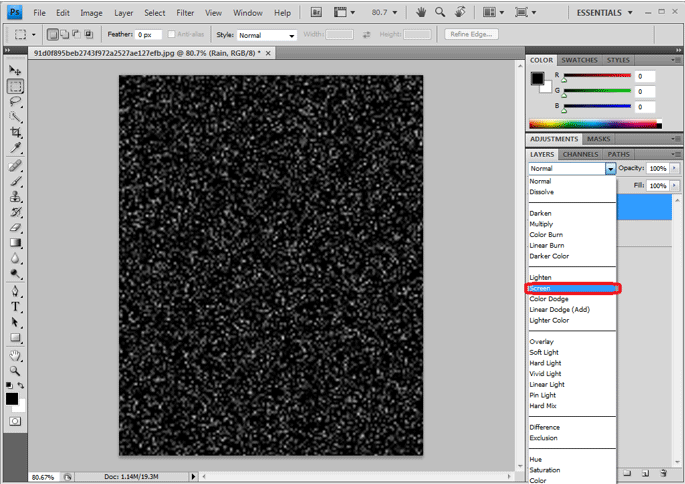
Step #5: Change the Blend Mode to Screen
Till now, the Rain layer, which we are editing it in Blend mode, so change the mode to screen so that the below layers will be visible under the layer. All the solid black color disappears, and below the layer, which is our source image with white Color drops on it, will be visible.
Layers -> Drop down -> Screen
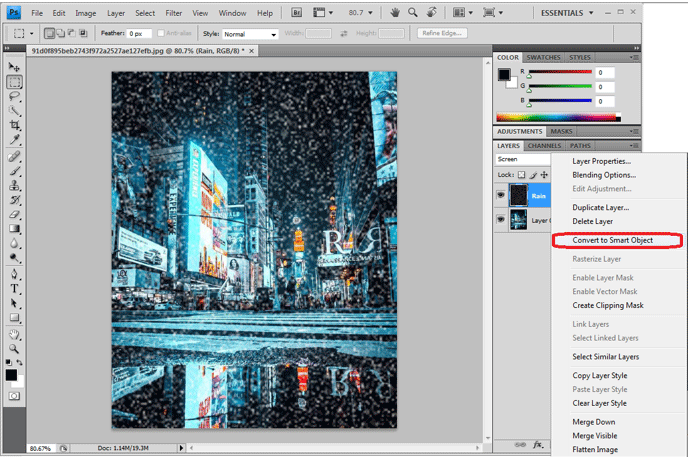
Step #6: Change the Rain layer to Smart Object
We need to add dynamics to the white drops so that they look as real falling rain so; for this, select the 3 line which is present in the layer window at the right corner and clicks the option as a smart object.
= -> Convert to smart object
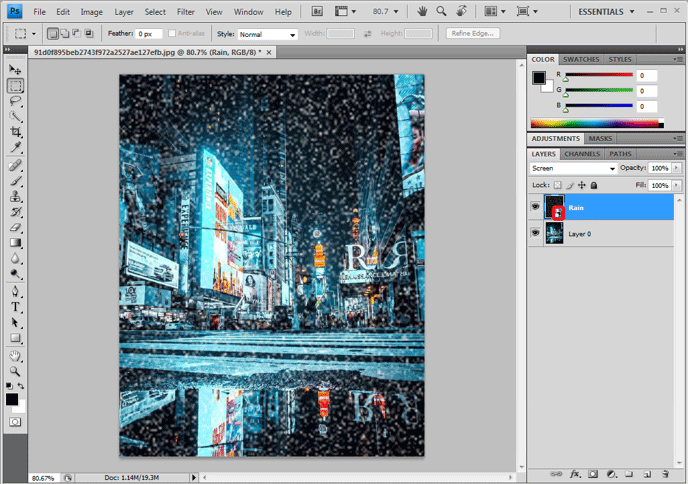
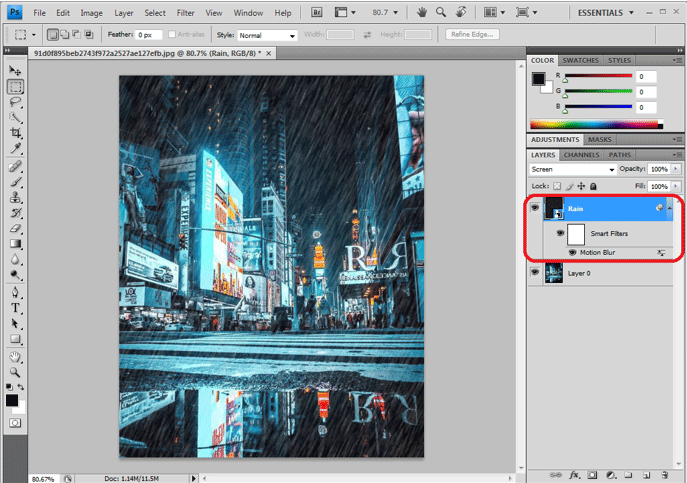
Step #7: Applying Motion Blur as a Filter.
After applying the smart object to the rain layer, we can see a preview thumbnail appearing to the layer.
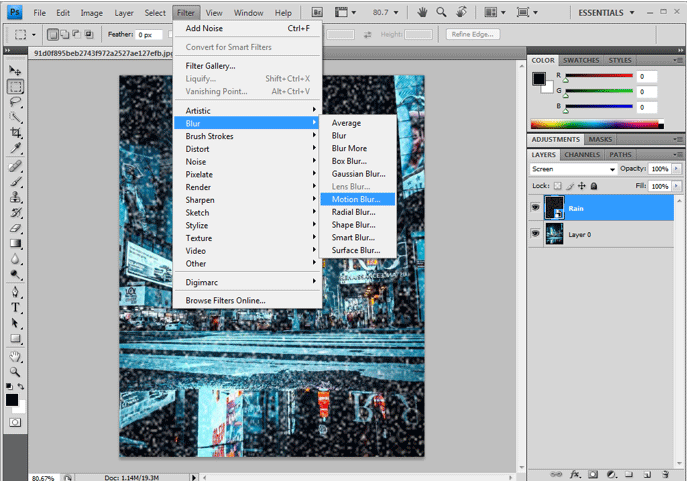
Go to filters, move the cursor to Blur and select the motion blur option to add motion to the white dots. To get the raindrops falling feel to the layer.
Filter -> Blur -> Motion Blur.
The motion blur dialog box opens, which must be configured as a required moment of drops on the image. Few properties are
Angle: – 65 Degrees
Distance (b/w Pixel to Pixel):- 75 Pixels
These and be varied based on the look and appearance of the image; manually check and preview twice, then click ok.
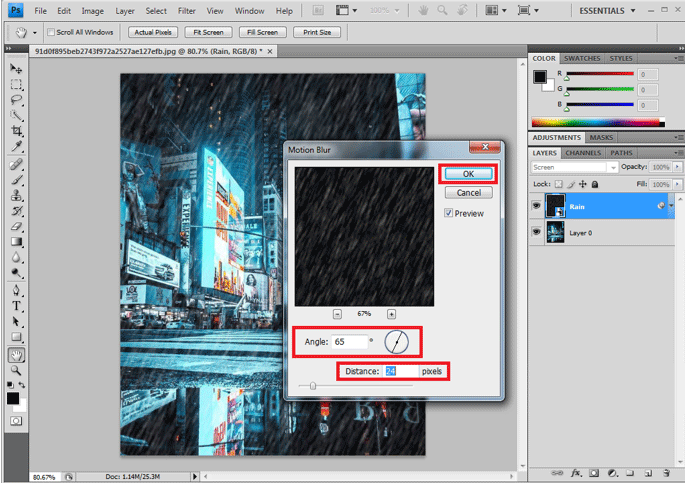
Motion configured will be added to the layer below as shown in the image, they can be changed by double-clicking the Motion dialog boxes opens, and then we can rearrange the values as required.
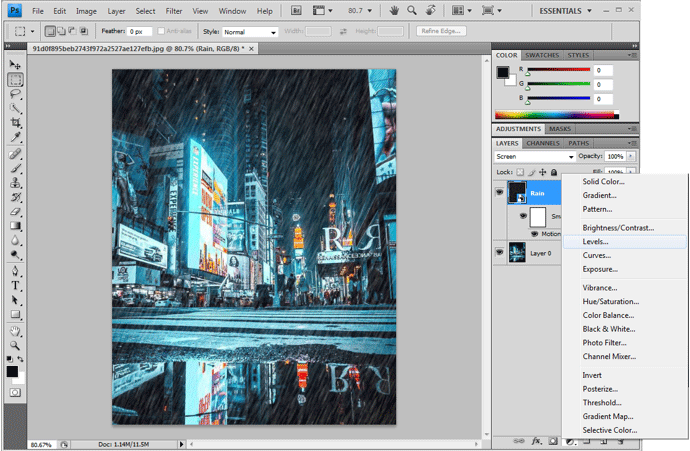
Step #8: Adding and adjusting levels of the layer.
To adjust and reduce the amount of rain and color, attributions like brightness and contrast effects can be changed on the image using this option.
Select Rain layer and press Alt key in win / Option on Mac from keyboard to create the New Adjustment layer. At the bottom of the layer pan also we can click and get it directly.
New Adjustment layers -> Level.
Enable Use the previous layer to create a clip mask option.
The new adjustment layer for the level adjustment rain layer creates.
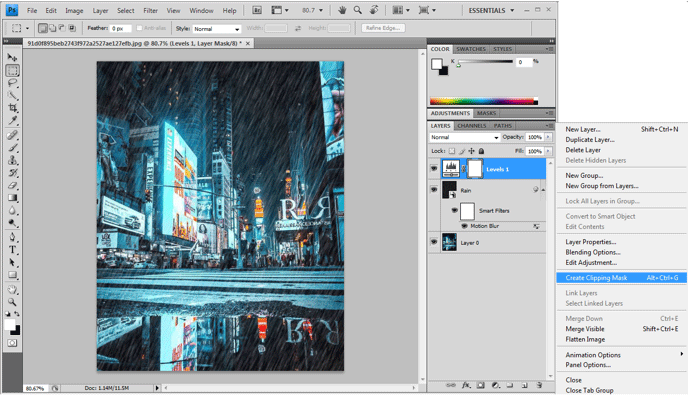
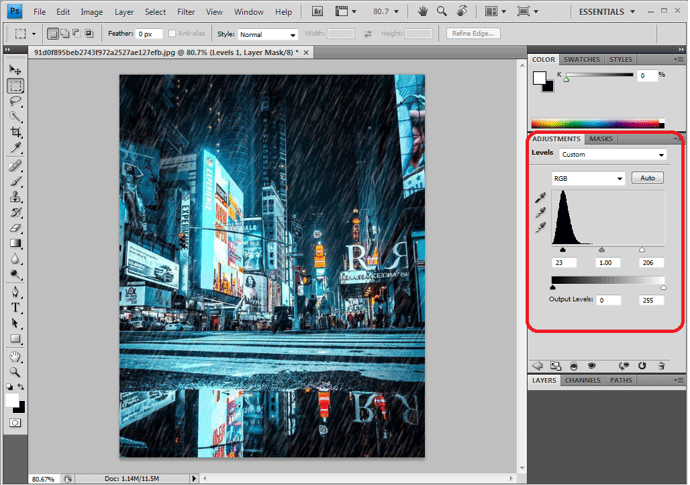
Step #9: Adjusting Level slider points
A new Level layer creates and will be linked with the rain layer below to it; double click on the new layer to open the dialog box of a level.
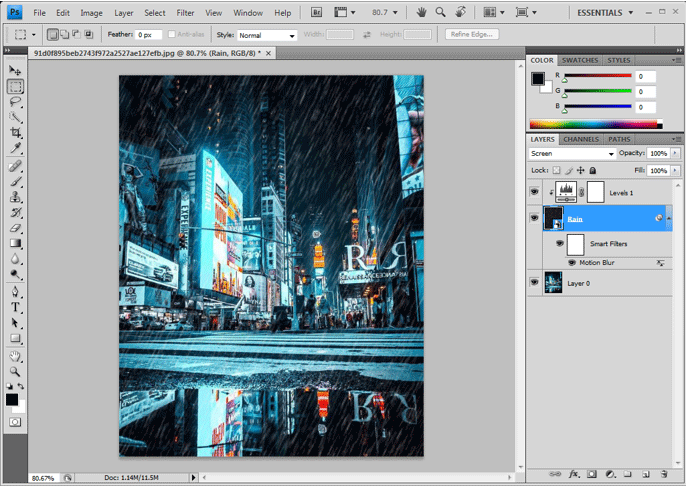
We have three points for level adjustments to move the first and last points (black and white sliders) closer to each other slightly by checking the changes happening as moved. And fix the levels at the exact required range so that we can get the look and feel of the rain following from an angle with a certain speed.
The Level mask and motion blur can be adjusted at any time to get the exact output. Once the image is final, we can export or save it in .jpg or .png as require. Beginners need repeated practice to get habituated.
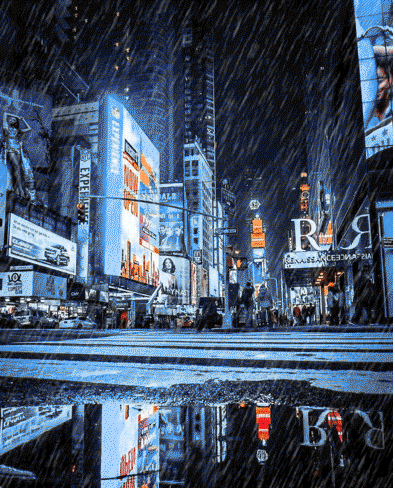
Conclusion
By these, we have the rain effect to a photo. The same steps can be followed for multiple effects on Photoshop. Users must understand the step by step attributions and their impact on an image to get the effect before getting the output. Try this for multiple images to get hands-on practice.
Recommended Articles
This has been a guide to the Rain Effect in Photoshop. Here we discuss how to create the rain effect in an image with the help of photoshop. You can also go through our other suggested articles to learn more –
- Sharpen Tool in Photoshop
- Custom Shape Tool in Photoshop
- Adobe Photoshop Tools
- Vanishing Point in Photoshop
How To Create Rain Effect In Photoshop
Source: https://www.educba.com/rain-effect-in-photoshop/
Posted by: ozunaweland.blogspot.com
0 Response to "How To Create Rain Effect In Photoshop"
Post a Comment